Trub Trapper Review

Trub Trapper

The Trub Trapper hop filter

Over the past 4 months or so I have been trying hard to find a good solution for keeping the solids and hop matter created during the boil, out of my homebrewing fermenter.  I started out using a Blichmann hop blocker, which worked fine, but I was a little disappointed with the quantity of wort that I had to leave behind in the kettle.  I then switched over to a hop spider / stainless steel hop filter which worked terrible as I was plagued with clogging issues. I then used 2 stainless steel hop filters with worked better but I still had major concerns regarding diminished hop utilization. Now I have found myself going down a new path and trying the Trub Trapper.

The reason I purchased the Trub Trapper was because on paper it looks like the perfect solution for my needs and works well with my all grain configuration.  What I like about the design of the trub trapper is that it has no top or bottom, so the hops can circulate in the kettle and I do not have to worry about reduced bitterness and aroma from stagnated hop circulation. It has a low profile so even if it gets clogged, there wont be too much of a wort loss and most importantly the trub is supposed to be caught in the trub trapper during the whirlpool so I do not transfer it to my conical fermenter.

So how does the trub trapper work in reality?

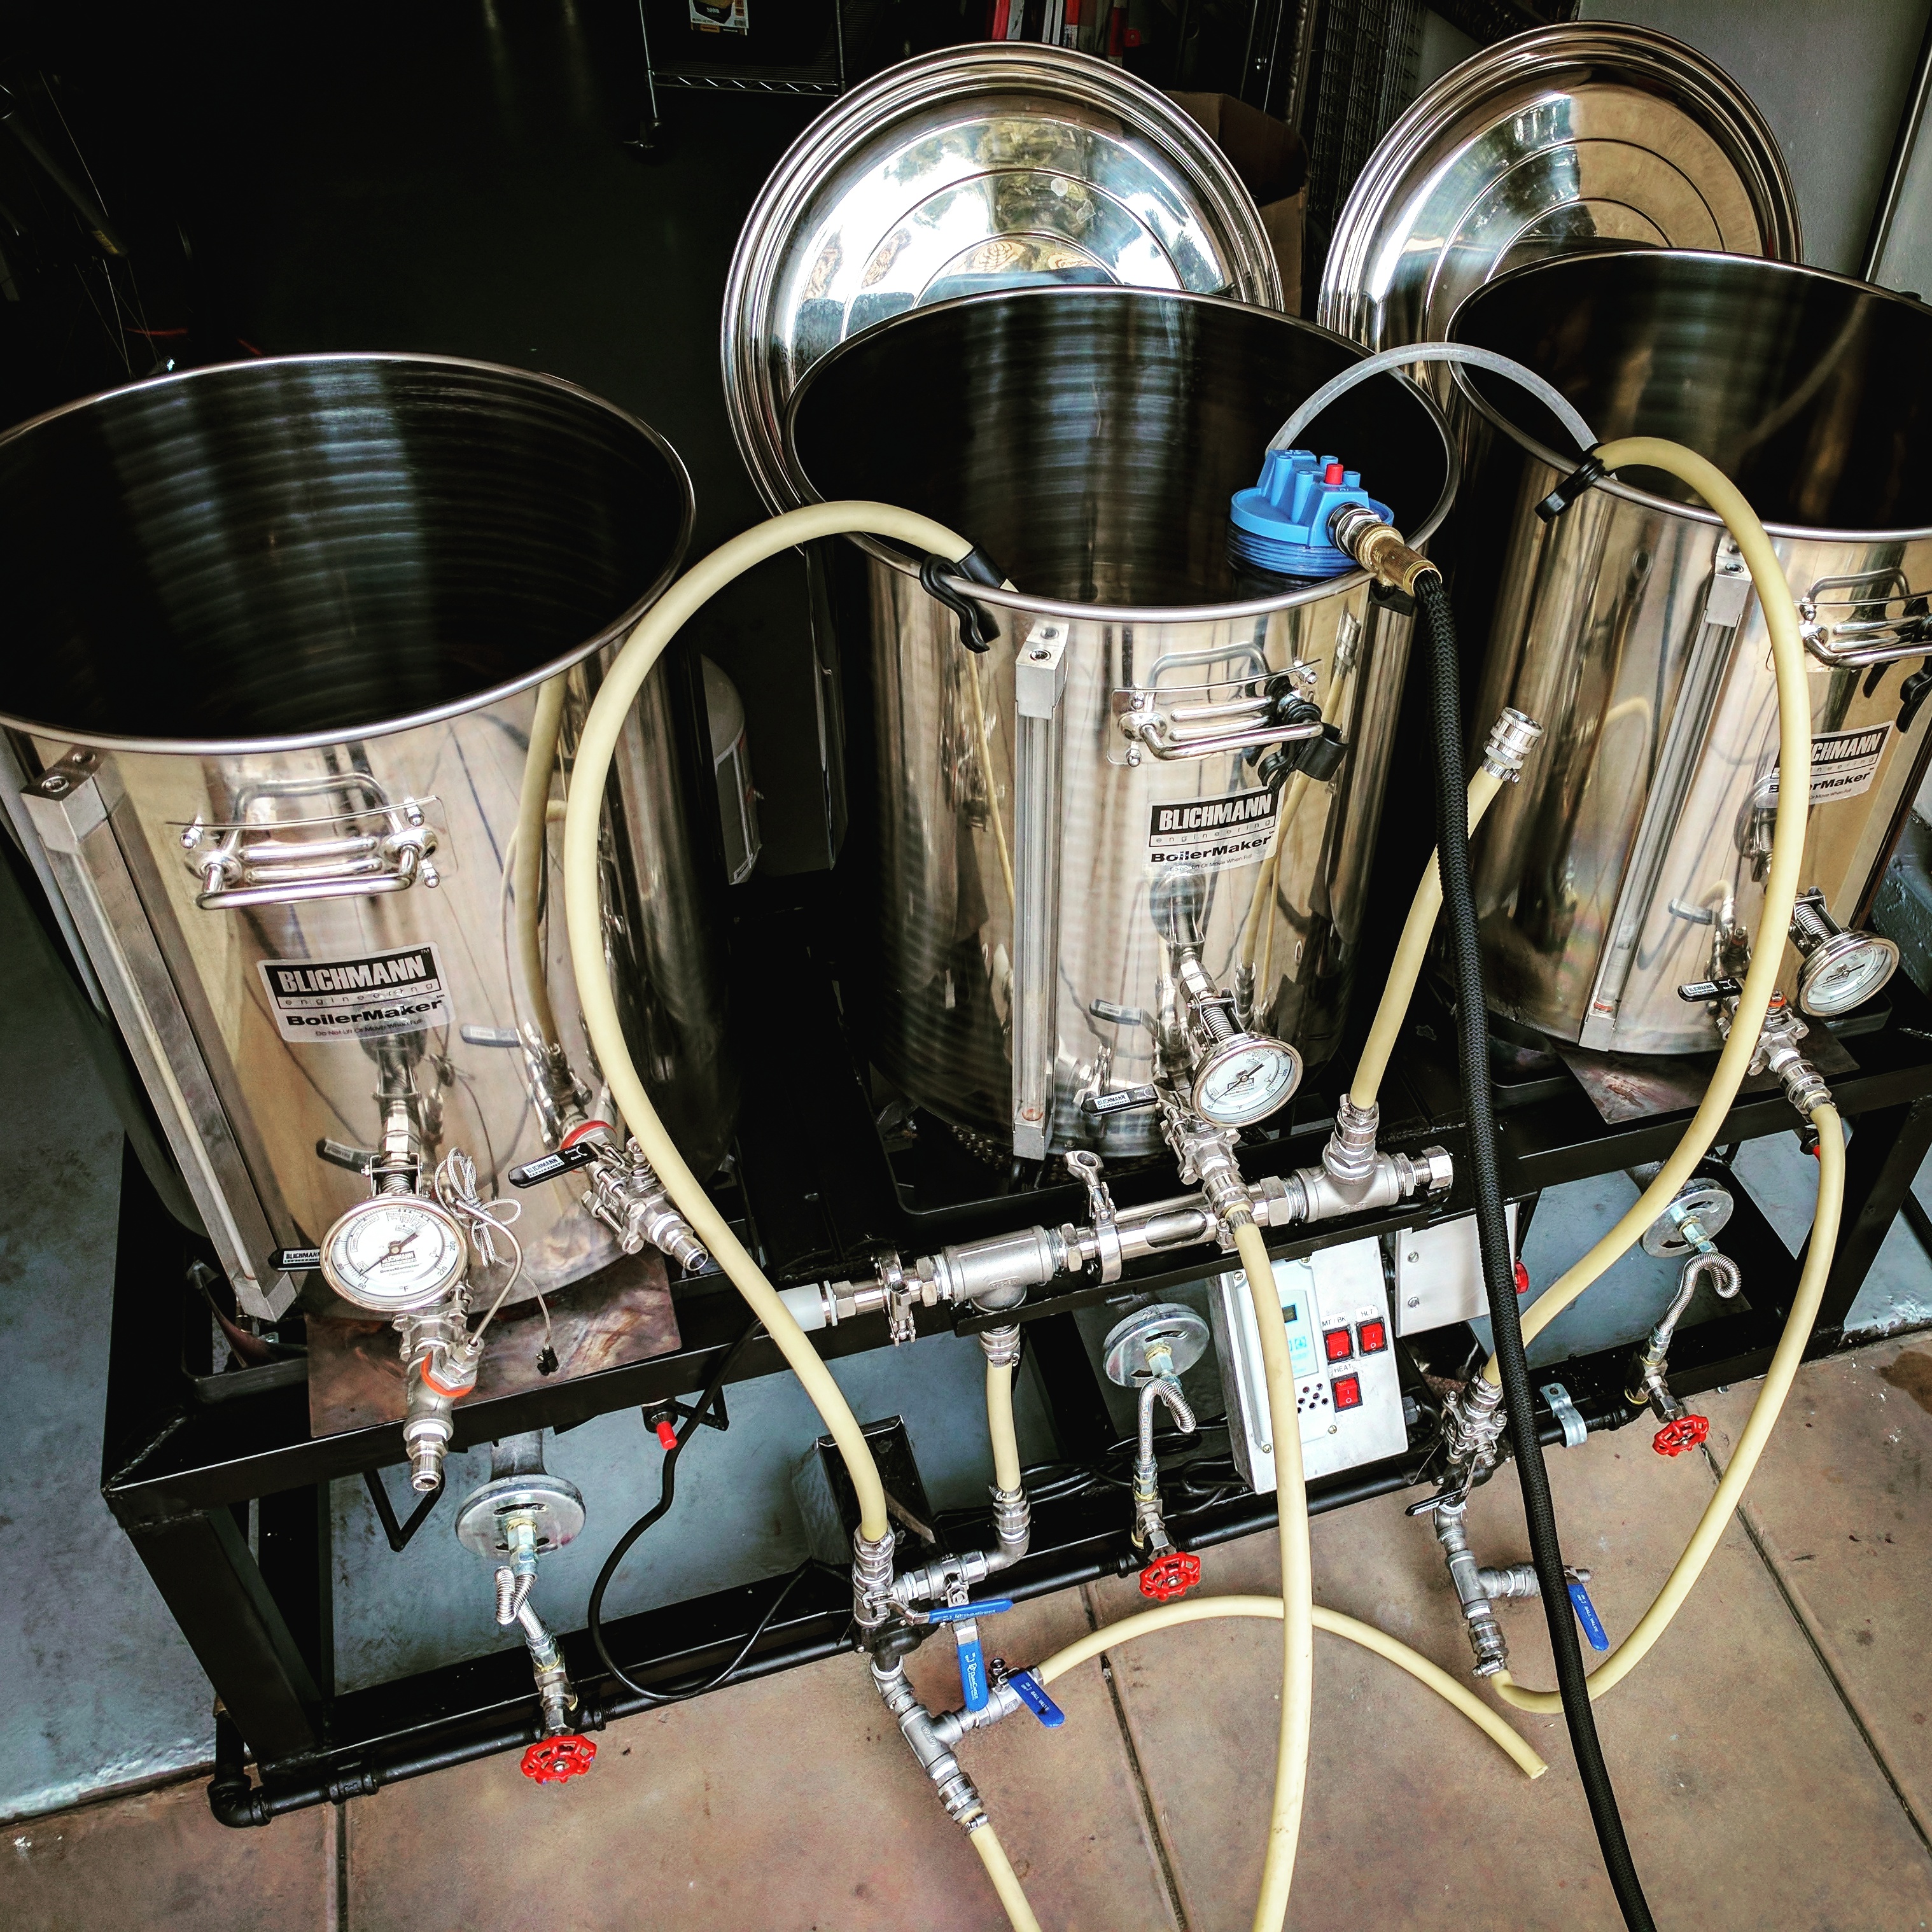
Per the description of the trub trapper, it is intended for a 10 – 15 gallon home brewing kettle and they do offer a smaller version for 5 gallon kettles.  I use a 20 gallon Blichmann home brewing kettle, but for the most part only brew 5 and 10 gallon batches, so I figured, what the hell, I will give it a shot with my setup.  My initial concern once I received the trub trapper was that it might be too small for my brewing setup but I figured I would give it a test run anyhow.

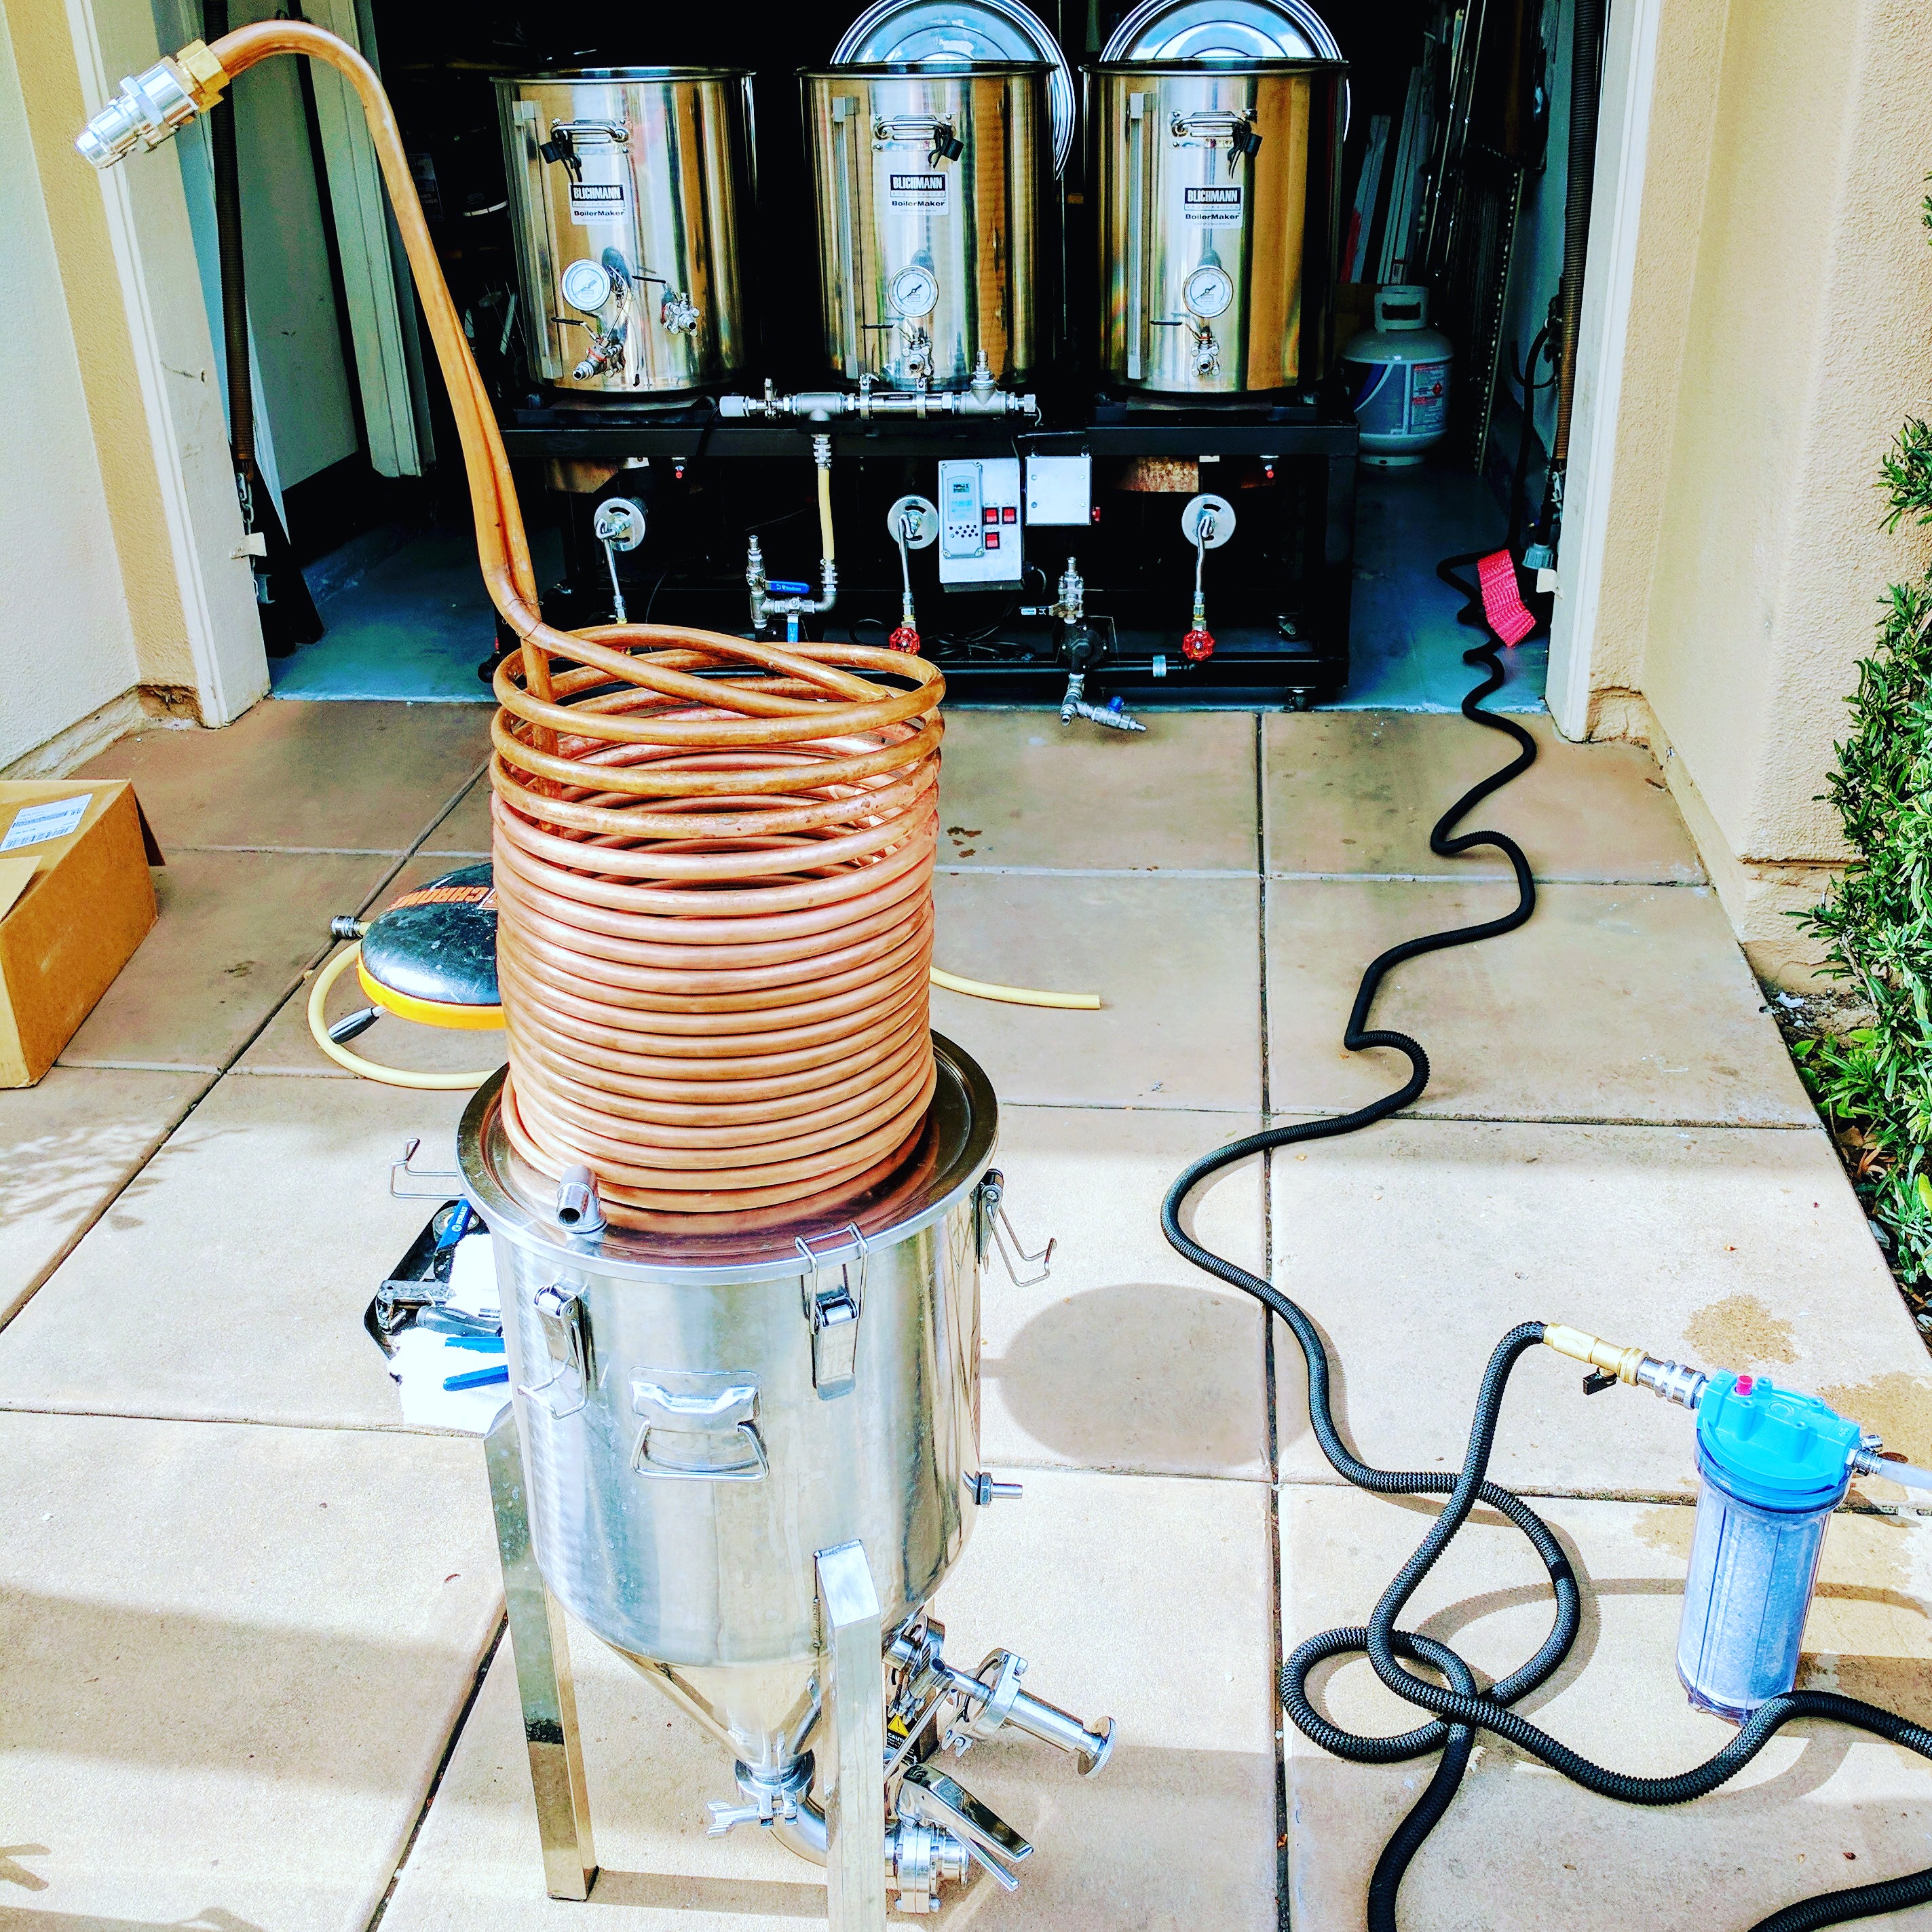
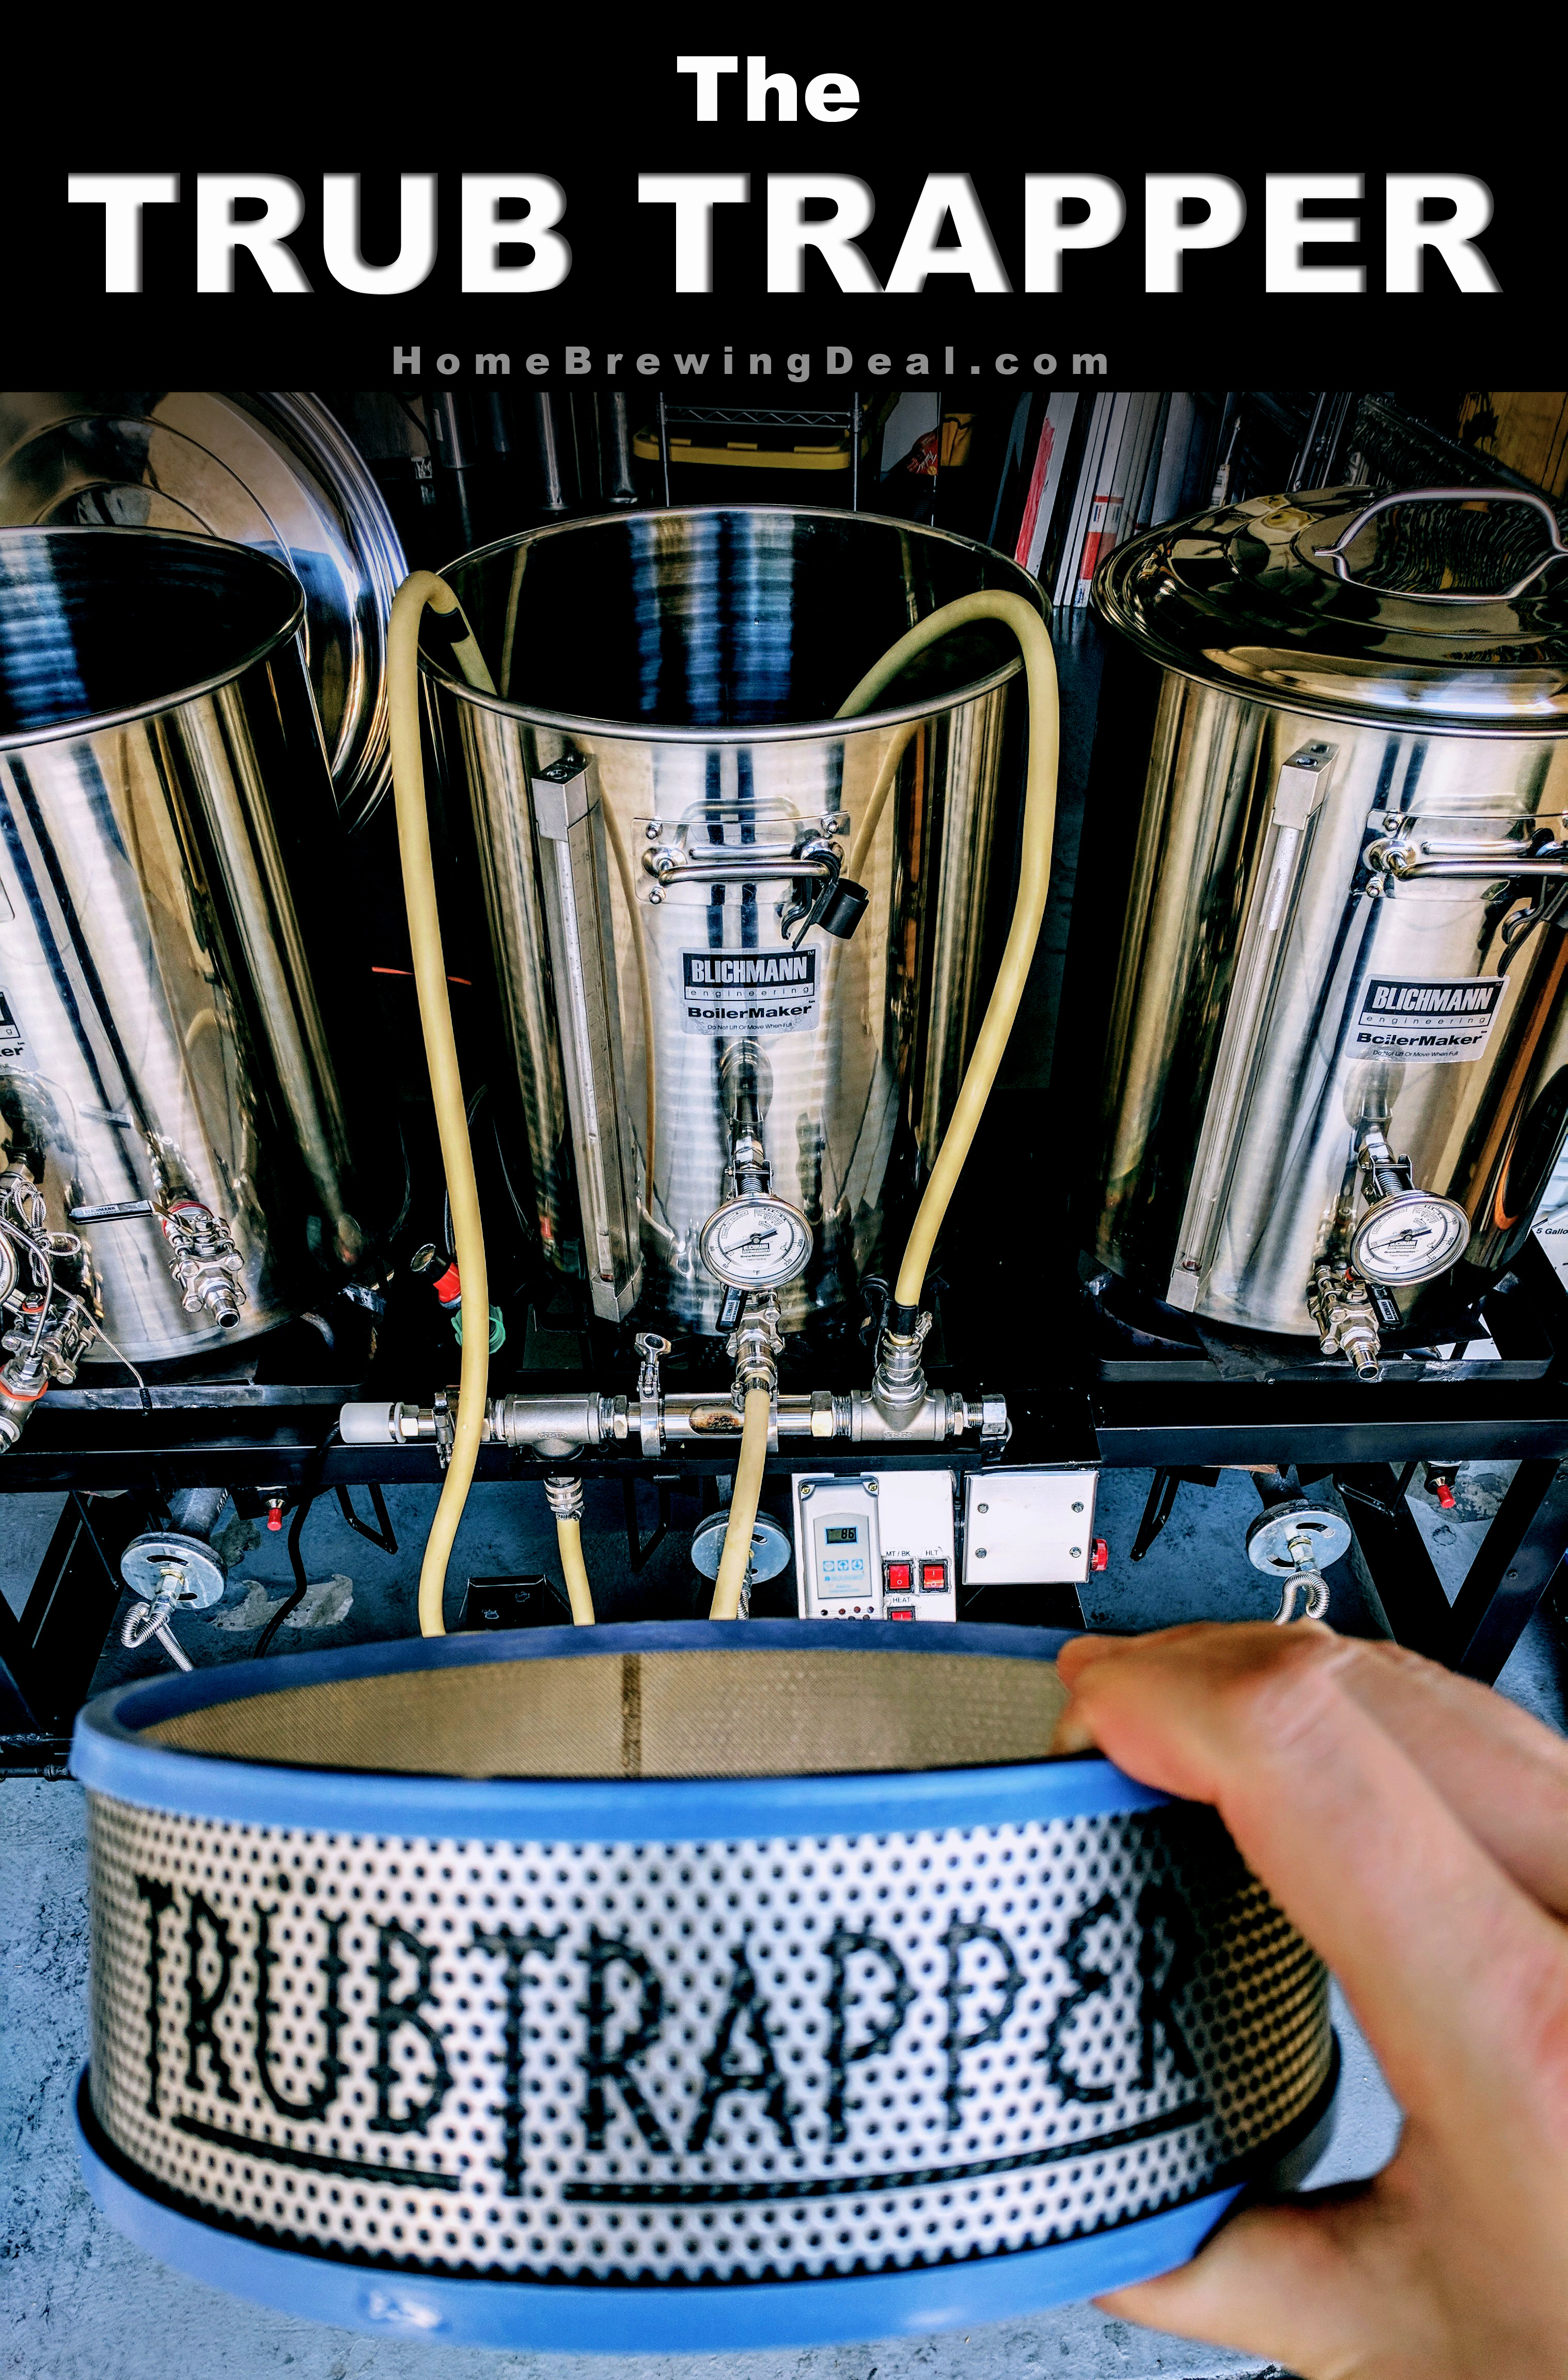
For my test brew, I went with a 5 gallon batch of MoreBeer’s M-80 All Grain IPA home brewing recipe.  I figured the 6 oz’s of hops would be a good test of the Trub Trappers capabilities.  Prior to brew day I started off by giving the TrubTrapper a good cleaning, like I do with any newly purchased home brewing equipment. The design of the Trub Trapper is relatively basic.  It looks like an old school air filter but instead of a paper membrane in the center, it has a ring of drilled stainless steel surrounded by a layer stainless steel mesh. On the top and bottom of the Trub Trapper there  is a silicon seal. Prior to starting my boil, I placed the trub tapper in the center of my boil kettle as shown in the following photo.

TrubTrapper

TrubTrapper

Something important to keep in mind, the TrubTrapper is only going to be effective if you have the capability of conducting a whirlpool at the end of your boil.  Whirlpooling is a brewing process where after your boil has completed, you recirculate your wort inside your kettle with the use of a pump and whirlpool arm. As the wort swirls around your boil kettle, the trub trapper catches and contains it.  If you do not have a whirlpool arm in your kettle, you can easily add one yourself as I did.  A whirlpool arm will run you about $38 and you can find a great home brewing whirlpool arm here if needed. This animated homebrewing gif shows the whirlpooling process being conducted.

Home Brewing Whirlpool Animated Gif

Home Brewing Whirlpool Animated Gif

For the trub trapper to be most effective, you need to allow the wort to whirlpool for about 10-15 minutes.  Depending on your homebrew recipe, this could be a great time for a hop addition or to begin your wort chilling process which is what I did.   All in my whirlpool process lasted about 20 minutes before my wort had chilled down to 70 F and I began transferring it to my conical fermenter. So did the Trub Trapper work?

The TrubTrapper

The TrubTrapper

You bet your sparge arm it did! The TrubTrapper exceeded my expectations.  As you can see from the photo above, it did a fantastic job of capturing the trub and keeping it away from my kettle transfer tube.  Initially it clogged a little bit, but I learned that if i burped the far side of it, the seal permitted the caught wort to escape while the Trub Trapper still contained the thick trub sludge. For $35 I feel that it was a great buy, especially when considering that alternative solutions cost far more and are not nearly as effective.

If you are considering buying a TrubTrapper, you can get it for a great deal here!

Purchase the Trub Trapper Here

#trubtrapper #trub #trapper #homebrew #homebrewing #hop #filter #screen #spider

Just $99 For A 15 Gallon Homebrewing Barrel!

Just $99 For A 15 Gallon Homebrewing Barrel!

Just $99 For A 15 Gallon Homebrewing Barrel!

Adventures in Homebrewing Promotion
Sale from Adventures In Homebrewing – April 2017
Sale Date: 4-10-2017 to While Supplies Last
Promotion Details: Just $99 For A 15 Gallon Homebrewing Barrel!
Home Brewing Link:  HOME BREWING BARRELS
Product User Rating: 5/5
Availability: In Stock

Sale Description: Adventures in Homebrewing is currenting having a home brewing sale that can save you up to 50% on serveral home brewing items including homebrew kegs!  One of the best items in this sale are 15 Gallon used Whiskey Barrels which are fantastic for aging your homebrew in! These homebrewing barrels come from FEW Spirits which is a distillery located in Evanston Illinois that has been named in several articles as an up and coming distillery to watch. These once filled charred oak whiskey barrels will impart a whiskey taste and aroma on your homebrew, and improve the depth of flavor and complexity of your next beer. These are great for aging bold stouts in!

Homebrewing.org Home Brewing Beer Barrel Sale

Home Brewing Deal found at: Homebrewing Coupon

#beer #brewing #home #brew #homebrewing #homebrew #brewer #brewery #keg #pin #ball #lock #sale #best #price #promotion #Beer #Barrel

Save $7 On a More Beer Ugly Fish IPA Beer Kit

Save $7 On a More Beer Ugly Fish IPA Beer Kit

Save $7 On a More Beer Ugly Fish IPA Beer Kit

Limited time and quantity MoreBeer.com Promo Code
Promo Codes for the Month of April, 2017
Coupon Code Date: 4-10-2017
Promotion Details: Save $7 On a More Beer Ugly Fish IPA Beer Kit
Promo Code: BEERDEAL
Product User Rating: 5/5
Availability: In Stock
Coupon Description:  Save $7 on a More Beer Ugly Fish IPA Homebrewing Beer Kit.Contrary to it’s name, Ugly Fish IPA is actually one of the most beautiful beers we have to offer!  Designed as a clone of the highly sought after Ballast Point Sculpin IPA, the Ugly Fish IPA is a hop masterpiece.  This beer starts with a very clean bitterness from Warrior hops, and finishes with a beautiful blend of Cascade, Simcoe, and Chinook late additions.  With almost 10 ounces of hops, the Ugly Fish IPA is definitely a hop forward beer, but does have a solid malt profile that stands up to those hops and helps to keep it reasonably balanced. Remember to enter More Beer promo code BEERDEAL to save $7 at check out. Here are the details on this More Beer IPA Homebrewing Kit:

Estimated OG: 1.067-72
SRM: 8-9
Estimated IBU’s: 62-67
Estimated alcohol ABV%: 6.9-7.4%

MoreBeer.com Promo Code Beer Kit

Home Brewing Coupon Code Found At:  West Coast Brewer

#coupon #homebrew #homebrewing #homebrewer #beer #brewing #home #brewing #brewer #deal #more #beer #morebeer.com #promo #coupon #code #beer #kit #recipe #IPA

Cleaning the home Brewing system

Cleaning home brewing equipment is now my favorite aspect of home brewing, but I know that it is a critical part of creating good beer and keeping my home brewing rig functioning properly. My home brewery has grown to the point where it has gotten complicated to clean.  Home brewing equipment such as ball locks, hoses and pumps create pockets of space where bacteria can thrive. After a home brewing session, you have basically created the ideal environment for a bacterial incubator to form. It is a damp, dark environment that has a thin sugary syrup coating everything from the wort passing over it. If you do not clean properly, you are setting yourself up for possible beer contamination and off flavors.

I do not worry about my Hot Liquor Tank and the pump that drives it since it is only passing hot or cold water.  I just make sure that the pump, valves and hoses are kept free from moisture.  As far as my RIMS, Mash Tun, Boil Kettle, Valves, Hoses and Pump that feeds those system goes, I have a different process.  The primary aspect of that process is recirculating a warm / hot (120 F) bath of PBW over everything for 15 minutes. You can actually see the water change in color after it has recirculated for a few minutes. I then allow the equipment to soak over night, then heat the solution again and flush it with clean water.  I then break down my RIMS system and scrub out any lose debris, scrub my valves and reassemble.  Like I said, it is not fun, but cleaning is an important part of brewing.

If you are looking for a great home brewing cleaner, you should give PBW a shot. You can find it here:

PBW Home Brewing Cleaner

Now a cleaning cycle on the home brewing rig with some PBW #homebrew #homebrewing #homebrewer

Save 25% On Star San Home Brewing Sanitizer Today Only

Save 25% On Star San Home Brewing Sanitizer Today Only

Save 25% On Star San Home Brewing Sanitizer Today Only

Limited time and quantity MoreBeer.com Promo Code
Promo Codes for the Month of April, 2017
Coupon Code Date: 4-9-2017
Promotion Details: Save 25% On Star San Home Brewing Sanitizer Today Only
Promo Code: BEERDEAL
Product User Rating: 5/5
Availability: In Stock
Coupon Description:  Enter MoreBeer,com Promo Code BEERDEAL at check out and save $4 on a bottle of Star San homebrewing sanitizer.  Star San is about as good as it gets when it comes to a home brewing sanitizer. Star San is an acid based homebrew sanitizer that is quick, odorless, tasteless and safe for most materials except softer metals.
Star San is safe and simple to use. Just use of 1 oz or StarSan home brewing sanitizer per 5 gallons of water and allow for a contact time of just 1 minute.  As a high foaming home brew sanitizer, Star San’s foaming action insures coverage and contact time in larger vessels and better penetration. Any foam that is left over in your carboy or keg will not harm your beer or you, and is perfectly safe and non-toxic, nor will it impart any flavors or odors.

MoreBeer.com Promo Code Homebrew Sanitizer

Home Brewing Coupon Code Found At:  West Coast Brewer

#coupon #homebrew #homebrewing #homebrewer #beer #brewing #home #brewing #brewer #deal #more #beer #morebeer.com #promo #coupon #code #sanitizer

Hazy IPA All Grain Recipe

Hazy IPA Homebrewing Recipe #homebrew #homebrewing #recipe #hazy #ipa #vermont #style #allgrain #beer #juicy

Hazy IPA Homebrewing Recipe #homebrew #homebrewing #recipe #hazy #ipa #vermont #style #allgrain #beer #juicy

When I started homebrewing (back in my day), beer clarity was important and the sign of a quality beer when it came to styles like lagers, blondes, pales and IPA’s! Whenever I would have an IPA, part of my rating of the beer, brewer and brewery was if they were brewing a clear / clean beer. About three months ago, one of my good friends challenged my belief on what a good IPA looked like and tasted like.  He ordered a Vermont style IPA / Juicy IPA / Hazy IPA / New England IPA / Whatever the hell you want to call your cloudy IPA, and convinced me to do the same.

As the waitress delivered my beer, I remember thinking, I hope this monstrosity does not give me a hangover and hopefully it wont taste too terrible. Then I took my first sip. I was taken aback. It was delicious! I had to quickly take another, larger sip. My brain tried to analyze the surprising flavor as my preconceptions were quickly being erased. I asked my friend,”do they add fruit juice to this?” He answered “no”. I had to ask him if he was sure because it was so juicy.  It was a wonderful mix of tropical and citrus hop flavors bursting from the beer. From that point on, I was a fan of the style and knew that I had to brew one.

So I started doing some research and decided that I was going to start with the “Haze Craze IPA” all grain hazy IPA beer kit from More Beer.  The name did not sell me on the kit, but the recipe and hop additions did.  I made a couple of small tweaks to the recipe, but they were pretty insignificant.

Here is what I ended up with:

Water Additions:
( This will depend on your water, I do not have much mineral content in mine)
1 tsp Calcium Chloride (Mash 60 min)
1/2 tsp Gypsum (Mash 60 min)

Grain Bill: (Mash at 150F)
10 lbs 2-Row Malt
1 lb Flaked Oats
1 lb Flaked Wheat
8 oz Carapils Malt
8 oz Wheat Malt
4 oz Honey Malt

Hop Additions:
0.5 oz Warrior 60 Minutes
1 oz Citra 5 Minutes
2 oz Mosaic (Whole Cone) Whirlpool 15 min
1 oz Citra Whirlpool 15 min

Dry Hop Additions:
I know this is not typical, but add the dry hops about 3 days after the start of fermentation.  Begin fermenting at 65F and then boost the temp to 70F when adding the dry hops.
2 oz Mosaic  3-10 Days
1 oz Citra 3-10 Days
1 oz Mosaic 7-10 Days
2 oz Citra 7-10 Days

Yeast:
London Ale III (This is important for fruity ester and haze production)

The beer came out fantastic! If you are considering brewing up a Hazy IPA, I highly recommend this recipe.  Homebrew Supply also has an extract version of the recipe available for extract brewers.  The beer kits can be found here:

Haze Craze IPA Home Brewing Recipe

Home Brew

Home Brew #homebrew

Home Brew #homebrew

Recently I had the pleasure of brewing up a batch of beer on one of my friends home brewing setups. It is always nice to get another home brewers perspective on home brewing. I find that I learn a lot about the home brewing craft from examining other home brewers methods and practices.  Even better, both of us use similar home brewing hardware and like similar styles of home brew.

Home Brewing Rig

Home Brewing Rig

One of the biggest differences in our home brewing systems and our beer brewing practices is when it comes to the mash. Where I have made my mashing process complicated (possibly over complicated) over time, doing my best to make sure my mash is at a specific temperature for the entire 60 minutes, he sets his mash temp, closes the lid and does not attempt to correct for any temperature loss over time.  By the time his mash has completed, the temperature in his tun has only dropped by approximately 6 to 8 degrees F.

My concern with a drop in mash temp would be that perhaps the finished beer would come out too dry or thin due to the lower average mash temp, the starches would only be converted to very simple sugars. Yet after sampling several of his beers, that did not turn out to be the case. I sampled 4 of his beers that day, varying from stouts to IPA’s and all of them were fantastic.  I would not describe any of his beers as too thin or too dry.

Home Brewing Mash Conversion Temperatures

Home Brewing Mash Conversion Temperatures

The image above is of my Blichmann BrewMomerter. I hi-lighted the segment that pertains to the mash conversion. As all grain home brewers, for the most part we mash at between 150-152 F to get a well rounded mash conversion. When I asked my friend if he was concerned with the temp dropping, he said that he felt that most of the starch conversion was occurring early in the mash process while his temperature was on target and that he had never noticed a degradation in the quality of his finished beer since he started conducting his mash in this manner. I am inclined to agree with him based on the high quality beer that he produces.

I think that sometimes as home brewers, out of our desire to brew “perfect” beer, sometimes we go too far and over complicate things (or at least I do).  I am not saying to ignore your mash temperature or to only mash for 10 minutes. My point is more that modern varieties of beer have been produced for over 600 years, well before yeast was even discovered in 1857. Considering that our ancestors created beer without having the benefit of such instruments as a BrewMometer, perhaps there can be some flexibility when it comes to brewing.

One of the home brewing items that he possesses that I am pretty envious of is a large sized stainless steel hop spider.  When I say large sized, I mean large sized, this thing is giant as you can see from the animated image.  The photos were taken during the whirlpool process after the boil had completed. I have been trying to get a hop filtering system to work out on my home brew system for the last few batches without a great deal of success.  I have been trying to overcome some challenges with clogging issues in my hop filter and he shared some great advice with me.  He said that in order for a hop filter to work properly and to get similar hop utilization compared to not using one, you need to have a hop filter that is at least half the diameter of your home brewing kettle. The size of the filter made a dramatic difference. I could see the wort moving around inside of his filter and he had hardly any clogging issues.

Home Brewing With A Hop Spider Animation

Home Brewing With A Hop Spider